2018/08/29

9 Most Risky Android Apps Which Should Be Deleted Immediately 2019


When you visit the Google Play store, you get really intrigued by what apps they show for your convenience from the things that you search for. But not everything that they show is verified. It is said that the apps that are verified are the ones you can rely on. The apps that are not verified are the ones you shouldn’t blindly have faith in because they might be risky and you should take up anything else in compensation for that which is verified. Here we have listed some of the Android apps that might be risky for your android phone which you should delete as soon as possible.


Must Check Out Posts:


How to Hide Secret Apps on Android Phone


Top 5 Best Antivirus Apps for Android for Virus Removal


The Best Web Browser for Android


The Best Mobile Keyboard Apps for Android in 2019


The Best Ringtone Apps for Android


The Best Android Backup Apps 2019
Social media


Apps like facebook take a lot of power in your battery while it is on. We are only talking about the mobile version of the app.


Likewise, even other social media apps, like Twitter and Instagram works the same way. we might think that the hackers might be the people behind the bug but it is the app itself that takes a lot of energy and that is the reason your smartphones lag.You may also like:Gihosoft Mobile Transfer: 1 Click Data Transfer from Phone to Phone


For instance, Facebook users usually get the mobile version of the app because it is easier to use.
Weather apps


It became very popular at first, but the weather apps actually have a lot of viruses in them. For instance, an app had an inbuilt trojan in it that used to collect the data from the owner's phone and sent it to the hackers. These hackers were mostly interested in credit card data.


But now the popularity of these apps have now been declining, because now it is much easier to check weather forecasts through a browser.
Built-in browsers


There are many browsers which are inbuilt by default on the phone and these are the ones which are not very popular and thus you don't seem to use it regularly, these apps are of no use and you should rather get rid of it immediately as they are only take up more space in your phone leading your battery juice gets over soon.


For instance, google chrome is usually of no use in your phone and this program doesn't have protection and this slow downs the system.
Optimizers


Optimisers for your phone is supposed to take care of your phone and clear cache that eats up your space unnecessarily. The modern phones have usually this inbuilt in it which is useless, plus it eats up your battery and it also annoys you with the ads.
Browsers with additional features


There are special features of the browsers, watching videos and streaming. But these apps have two major risks.


Firstly, there are many ads in it and who like ads popping up every time to try to do something online? This even makes it run slower.


The second main disadvantage is that the applications require access to many parts of the system, even managing calls. This is unsafe and creepy!
Antivirus programs from unknown developers


When the hackers arrived by hacking the phones and stealing data, mobile antivirus apps started appearing for us to assure that we are safe. But the hackers were smarter and they created apps like antivirus which steals your personal data and even block your phone.
Apps for increasing the amount of RAM


There are many apps that claim that they can increase the amount of RAM are optimizers and they already have the ability to clear the cache temporarily. You cannot get more RAM than your phone already has. These can be scams and can easily collect your data.
Defragmentation apps


Apps like these are usually popular as they are similar to the ones used in computers. As there are no hard drives on smartphones for these defragmentation apps on the phone which is why they can only analyze how much space certain programs take up. These apps are more creepy because it uses your phone’s resources and can collect your personal data.
Lie detectors


Apps like these are literally too kiddish and it is solely for fun purposes and you might think that the phones in the future might have biometric sensors equipped in it and which will be able to read the heartbeat rate while answering questions.


But the apps that we have now are as useful as crystal balls which are of no use and which eats your battery. Plus, apps like these have nothing to do with your contacts and personal stuff so when they do ask you for permission to access these territories of your phone then you should not install it!


Jihosoft Android Data Recovery is the most powerful and professional data recovery software for Android that can restore deleted or lost contacts, photos, videos, audios, SMS, call logs, WhatsApp chat, Viber messages from any Android devices due to accidental deletion, virus attack, formatting. It supports all popular Android smartphones and tablets like Samsung, HTC, LG, Huawei, Motorola, Nexus, etc. In the meantime, you will be guided step by step if you never used this kind of tool before.You may also like:online youtube downloader


Jihosoft WhatsMate is an all-in-one WhatsApp Manager which can be used as a complete solution to backup, restore, recover and transfer WhatsApp chat history, contacts, call logs, pictures, videos, audio messages and all other WhatsApp attachments on Android & iPhone.


2018/08/28

How to Open iPhone 7 without Passcode - Other Solutions


How to Open iPhone 7 without Passcode Solutions

The following methods may not always work due to restrictions and limitations, but if you meet all the requirements, you can open your iPhone through them.
Solution 1.How to Open iPhone 7 without Passcode via iCloud

When your iPhone 7/7 Plus is locked or disabled, you can open it with iCloud “Find My iPhone” feature. However, this method can only work when you’ve synced your iPhone on iCloud, and with Find My iPhone enabled.

Step 1. Log in to the official iCloud account using a web browser. Provide your Apple ID and password.

Step 2. Click “Find My iPhone” and tap the “Devices” option. iCloud will display a list of devices you’ve linked to that iCloud account. Select the device you want to unlock.


Step 3. Choose “Erase Device” option and confirm your selection. After a while, iCloud will automatically erase your iPhone, and open it.
Solution 2.How to Open iPhone 7 without Passcode via Recovery mode

If you’ve never synced your iPhone 7 on iCloud or iTunes, you can use recovery mode to open it. However, this process only works if “Find My iPhone” is not enabled.

Step 1. Connect your iPhone 7 to a computer. Download iTunes and launch iTunes on your PC.

Step 2. While your iPhone is connected, force restart your iPhone. On an iPhone 7, or 7 Plus: Press and hold the Side and Volume Down buttons, and keep holding them until recovery mode screen appears.Must Read:seagate external hard drive not showing up


Step 3. On iTunes, choose “Restore”, and iTunes will wipe your iPhone and restore it with an updated version of iOS. Wait for the process to finish before you can set up your iPhone.

You may also like:Gihosoft iPhone Data Recovery

Must Read:Gihosoft Free Android Data Recovery

Must Read:Jihosoft iTunes Backup Unlocker

Jihosoft iTunes Backup Extractor free is a powerful tool to recover and extract important data from iPhone, iPad & iPod touch backup on Windows or Mac.

2018/08/27

iOS 13 concept showcases dark mode, multi-user support and more

iOS 13 concept showcases dark mode, multi-user support and more


As we look forward to iOS 12, Apple is silently working on iOS 13. A new concept by designer Jacob Rendina imagines what Apple’s next operating system will look like.


Table of Contents


Intuitive Multitasking


OLED-ready Dark Mode


Multi-user support


BlackBerry-inspired Hub for iPad


Shortcuts


Wrap up

Intuitive Multitasking


iOS 13 concept comes with three new multitasking modes – split screen, windowed mode, Curago-inspired blocks. Once you long press or 3D Touch an icon, it opens a context menu.


You can then open the app in windowed, split-screen or block mode.


OLED-ready Dark Mode


Rendina’s concept introduces a “true” system-wide dark mode just like NoctisXI.


Moreover, it also comes with an always-on display for iPhone X with a minimalistic Notification Center.


Multi-user support


This concept comes with multi-user support for both iPhone and iPad devices. You can log in to your administrator account just like your Mac and even set up guest accounts for other users on the same device.


A user who logs in will only get access to his own private photos, events, and contacts. Data belonging to other users or accounts will remain hidden.


BlackBerry-inspired Hub for iPad


The Notification Center and Control Center are combined into a single “dashboard” that is reminiscent of the BlackBerry Hub.


You can access your notifications, music player, and Control Center modules with a single swipe.


Shortcuts


iOS 12 comes with a standalone Shortcuts app but this concept takes them to a whole new level.


You can create shortcuts for Shazam, Notes, Apple Music, App Store apps, and native apps.


Wrap up


Rendina’s iOS 13 concept brings a dark mode, guest mode or multi-user support, jailbreak-esque widgets for the home screen and lock screen and tons of other cool stuff to iPhone as well as iPad.


Even though iOS 13 is a good few months away, tweak developers are working hard to bring this concept to life.


Antique Dev has already released Appolitary app lock based on this concept. If you want to test this tweak out on your device, fire up Cydia and download it from Packix repo.

Jihosoft Android Data Recovery: the best Android Data Recovery software for Windows and Mac to recover deleted contacts, messages, photos, videos, WhatsApp and etc from Android devices.

Gihosoft Android data recovery Free is a super awesome software specialized in Android file recovery. With this program, you are able to recover deleted photos, music, videos, messages, contacts, call logs, WhatsApp messages, Viber chat history and more from Samsung, Huawei, LG, HTC, Motorola, Google, Oneplus, Sony, Lenovo, ZTE and other Android devices directly. Meanwhile, this Android data recovery software is available for both Windows and Mac platforms.For now, check:Free iTunes/iPhone Backup Extractor for iPhone, iPad

Jihosoft iTunes Backup Extractor free is a powerful tool to recover and extract important data from iPhone, iPad & iPod touch backup on Windows or Mac.

Hopefully, the developer will port more features to iOS 11 in the near future.

Top selfie apps for Android 2019


Selfies may have become a thing in the modern world, but do you know what our ancestors used to do in those good old days? People used to stand in a queue outside of a photo booth waiting for their turn. The photographer used to charge them a certain amount for capturing their photo. It was a fun and exciting experience.


Camera used to cost 1000s of dollars in 1990s. As new technologies evolved, the price of the computing and imaging devices dropped dramatically. Now, most people in the world own a camera-equipped device.


Sponsored Ads: Best Free Android Data Recovery Software for Android-Recover Deleted Contacts, Messages, Photos, Videos, etc from Android Phones Easily!


We love to click photos no matter how or what the situation is. It is one of the best ways for many of us to relive those moments lost with time in this ever-changing world.


These days, when we think of clicking a photo, the first thought that pops up in the mind of many is a selfie – a photograph that we click of ourselves using the device’s front camera.Must Read:tumblr video downloader


Must Read:Jihosoft iTunes Backup Unlocker

You may also like:online youtube downloader

We can’t say the selfie revolution began in 2002. But yes, it was on September 13 of that year when the word first appeared in written form. The word was first used by a user named Hopey in a casual post on ABC Online Forum.


Selfie was nothing more than a word back then. Thus, it spread at a slower pace. By 2012, the word selfie was trending on social media platforms. People were clicking and sharing their self-portraits on Twitter, Facebook, and Instagram like never before. With growing popularity and frequent use of the word, Oxford Dictionary named selfie as word of the year in 2013.


This impact was so powerful that many came up with ideas to manufacture devices for people who love to take selfies. As a result, it gave rise to selfie sticks and selfie drones, which as of now have turned into a global business. There was also a significant rise in demand for smartphones offering the front-facing camera. Ever imagined a mobile phone to have a 25 megapixels camera in the front? Well, it is a reality now.


Even app developers took the mobile photography experience to a new level. Whether it’s Google Play or App store, you will come across a lot of apps that are specifically designed to help you click and edit your selfies on the go. Here’s the list of best Android selfie apps right now:
Retrica (Best at filters)


Retrica is one of the best third-party camera apps for clicking selfies. Despite being a free application, Retrica offers many powerful tools and features that will aid users in clicking beautiful and natural looking photos. But, what exactly makes this app an outstanding one is its vast collection of photo filters.


How to use Retrica?


After installing the Retrica app, launch it. If your device runs on Android 6.0 (Marshmallow) or later, the app will ask you to grant it permissions for accessing your device’s camera, microphone, location (optional), and storage. Tap the OK option and select your preferred mode. The app is by default set to clicking photos, but you can use it to create GIF, collage, or video.


Getting started with filters


Applying a filter to a photo has never been easier, especially on a mobile phone. At first, you have to click a photo or move an image from the camera or PC to the phone. Then, you must install a third-party photo editing app, configure its settings and import a picture into the app. From a handful of filters available in the application, select one you find interesting and tap the apply option. If results are not as expected, you will have to repeat the entire process several times until you get a perfect image. And how can we forget all those open applications in the background? You will have to deal with them too. Switching back and forth from one app to another. A total mess. But, with Retrica, it is as simple as a flick.


No matter what mode you’re in, a swipe from the right will switch to a new filter, and from left it will go back to previous. Moreover, unlike other apps, Retrica will let you apply a filter to your photo in real time. That means, you will be getting a sneak-peek/idea of how your picture will look, even before you click it.


Apart from applying filters to photos, you can do more with your pictures on Retrica. Some of the best features of Retrica are as follows:


Add stickers to photos: Stickers are time savers. They are free, easy to find, and can bring fun into a conversation.


These days, the use of stickers or emoticons is not limited to a conversation. You can use one or many to decorate your photos.


To decorate an image in Retrica, select a photo from the gallery or click a new one. Now, import the picture into the application and select the sicker option from the editing page. At first, you will notice a handful of emoji stickers, but as you swipe further, more stickers will appear on the screen. Select the sticker you like. When you do so, Retrica will place the sticker on the image. You can use the zoom option to change the sticker’s size. You can also change its position in Retrica.


Add text to photos: Photo sharing has become a trend these days. No matter where you go, you will find people clicking and sharing their photos on sites like Facebook, Google Plus, Instagram, and Twitter.


Websites provide an option to add description or captions to an image. But, what if you want to add a piece of text right on a photo? Well, there are a few websites that offer tools to help users personalize their photos online, but the process is a bit messy, and slow as well. Retrica allows users to add text to photos with ease.


To use this feature, select the text ‘Aa’ option from the editing page. A caret will appear over the image, along with a color picker. Select a shade and type what you want. When done, tap the zoom option to increase or decrease the size of your text or drag it to change the position.


Add stamps on photos: Retrica offers a stamp tool through which you can imprint a pattern or watermark on your photos. To use this tool, tap the stamp icon which is located in the upper right-hand corner of the editing page. When you do so, a panel containing varieties of stamps and symbols will pop-up. Select the one you like and save the image.


Create a GIF: Why to waste cellular data by downloading GIFs when you can create one of your own, right on your device. Today, rather than sending still images or text messages, many prefer using a GIF. GIFs are compelling and catchy. They’re funny too.


Creating a GIF was not as easy as it is today. Before the smartphone revolution, a user had to spend hours on their computer with some high-end photo editing software to create a GIF. These days you can create it in a few seconds using an app like Retrica.


To generate a GIF, switch to ‘GIF’ mode of Retrica. Pick a filter of your choice, or tap elsewhere to change focus or to adjust brightness levels. When you’re done, tap the shutter button. The app will auto click your photos in a series and convert the same to GIF.


Create a Photo Collage: With Retrica, you can create a photo collage with up to nine individual or consecutive shots. To create one, select ‘Collage’ mode from the control bar. The app provides 15 different layouts. Pick the layout you like. Next, set a time interval between photos. The app is by default configured to use 1/8 time interval, but you can change to 1/2s, 2s or manual.


Point to note: Setting shutter interval to ‘manual’ will prevent the app from auto-clicking photos for the collage.


Retrica enables users to convert their collage photos to GIF. This option is located in the upper left-hand corner of the screen. It is easy to use. Tap it once and wait for a few moments until the app turns your collage photos to GIF.


Verdict: There is no denying that Retrica is one of the best selfie apps on the market. If you’re obsessed over clicking portraits or selfies of yourself, this app is a must try. Retrica is light, easy-to-use, and ad-free.


Developers are keen to provide time to time updates for bug fixes and new features. The app gives you access to a community where you can share your photos, make friends, chat or even send private messages.


If you do not want to click a new selfie, but want to use features of Retrica on an existing image, you can. But there’s a catch. Apart from filters, blur, vignette, and rotation, you won’t get access to other tools. Also, for using features like stickers, specific filters, and stamps, your device must have an active internet connection.


Availability and support:


Android – Requires Android 4.0 and up.


Size – Varies with device.


Price – Free


Ad-free – Yes


In-App Purchases – No


Content Rating – Everyone (3+)


Offered by – Retrica, Inc.


Download Retrica


Also read: Best photo editing apps for Android and iPhone
Candy Camera – selfie, beauty camera, photo editor (Best at editing tools)


Users who are looking for an alternative to Retrica should consider Candy Camera app. If we compare both apps side-by-side, most features of the two applications are the same. But, one cannot deny, Candy Camera provides some extra tools and refinements that will help you click and edit your photos in a better way.


Some of the best features of Candy Camera are as follows:


Photo editor: Many times, before or after clicking a photo, we may spend a lot of time browsing the App Stores looking for a powerful image-editing application. Unfortunately, not all apps offer a complete set of photo-editing tools. Candy Camera app is one of the few applications that have a robust photo editor.


To get started with Candy Camera, all you need is an image. You can either click a new picture or import one right into the app. If you wish to continue with your on-device images first, select the ‘album’ option. Pick an image from the library, and tap the ‘Edit’ option. From the set of tools, select whichever you think will help improve your image and its quality. To apply the effect, tap the save option.


Photo filters: LIke Retrica, Candy Camera offers a variety of photo filters that will make your selfies look better, no matter how or in what lighting conditions you click them.


To see the filters, swipe upwards when you’re on the main screen of the app. Doing so will make the application display its hidden filters panel. Scroll all the way to the end until you find the ‘Add’ button.


As in Retrica, you can apply a filter to your photo in real-time. It is easy to switch filters in the Candy Camera application.


Beauty Functions: While clicking a selfie, due to shaky hands, lack of OIS (Optical Image Stabilization) or wrong timing, the picture may appear a bit distorted, blurry or even lack detail. These are some of the commons problems users face while trying to click a photo of something they want to. But that doesn’t mean you cannot fix them later.


On Candy Camera, there is an instant beauty feature that allows you to make changes/improvements to your face in real time. To use it, select the filters option. Now, tap the smiley face button present in the lower left-hand corner of the screen. The app will place three tools above the shutter, each with a slider to adjust the effect. Adjust the slider as per your requirements.


Apart from this option, Candy Camera includes a bunch of other beauty functions you can use on images stored on your phone. CC provides options to liquify, facelift, adjust smile, remove blemishes, whiten the teeth/skin, and so on.


Decorate photos with stickers: Candy Camera offers an immense collection of photo stickers which you can use to make your selfies look appealing and trendy.


To use this feature of Candy Camera, tap the ‘Striker’ option after taking a photo. There are a handful of sticker packs that come along with this app, but you can download more whenever you want. After adding a pack, you can flip your sticker, change its position, resize it to an extent, and also adjust transparency effect.


Photo Collage: Most of the time, you will find people uploading/sharing a bunch of photos on social media or messaging apps one by one. Frankly speaking, this method of photo sharing is a waste of time. Photo collages are one of the best ways to share multiple images at a time. With CC, it is easy to create a collage.


Creating collages with Candy Camera:


On the topmost bar of the Candy Camera app, you’ll find four options. Tap the option with title ‘Full.’ Now, a list with options to ‘change the aspect ratio of your preferred camera’ and ‘to pick a frame for clicking photos in the form of a collage’ will appear below. Select the 2nd item from the list.


There are over 28 different collage frames in Candy Camera. Keep scrolling through the list until you find one that meets your requirements.


Verdict: Whether it is editing photos, applying filters or recording short videos, Candy Camera makes complex things easeir for the users. Ads can be ‘really’ annoying sometimes, but since the app is offering tons of features in a small package, advertisements shouldn’t bother you much.


Getting used to Candy Camera is as easy as it is on any of its rival apps. In case of performance, you’ll notice sudden lags and freezes on heavy usage. Candy Camera receives updates on a regular basis.


Availability and support:


Android – Requires Android 4.0.3 and up.


Size – Varies with device.


Price – Free


Ad-free – No


In-App Purchases – No


Content Rating – Everyone (3+)


Offered by – JP Brothers, Inc.


Download Candy Camera


Must check: Best meme maker apps for Android
YouCam Perfect – Selfie Photo Editor (Overall best)


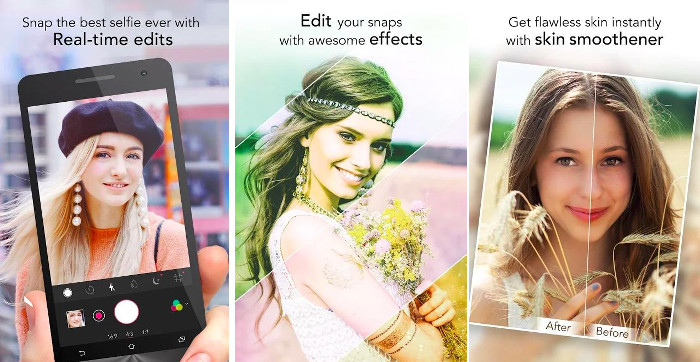
There is nothing more satisfying than using an app like YouCam Perfect to click selfies. YC has powerful editing tools, many filters, and options to personalize photos.


Here’s the list of top features of YouCam:


A collage maker: Unlike other apps where you have to figure out how to create a collage, YouCam Perfect lets you form one as soon as you launch the application.


When the app starts, you’ll find a list of shortcuts on its main screen. From the list, tap the ‘Collage’ option. A page displaying your image folders will pop-up, asking you to select ‘one to six’ photos. After adding pictures, tap the green check button which you’ll find on the top right-hand side of the window. Now, wait for a few seconds as the app will build and display your collage.


Point to note: The app will use a random frame on your collage. You can change the frame later.


Powerful image editing tools: The YouCam Perfect app offers several image editing and enhancing tools with which you can transform your photos into some incredible looking portraits. These tools are easy to work with and can help you do stuff like adjusting a body shape, getting rid of facial blemishes, removing unwanted objects from the background, tune image colors, draw using a paintbrush, etc.


To use these tools, select the ‘Photo Edit’ option and pick a photo you want to edit. Once the app loads the image, you’ll find two options on the screen – beautify and edit.


If you want to enhance facial or physical appearance in the selected image, tap the ‘Beautify’ option. If you want to make certain changes, corrections or add elements to your photo, like cropping, tuning image colors, or adding overlays, tap the “Edit” option.


Personalize photos: Personalizing photos using stickers, frames, or by adding text messages over them has become quite common these days. You don’t have to put in a lot of effort to find apps that support these features. YouCam Perfect is one of the best apps to personalize the images.


YC enables you to change the text font, color, etc. You can also add “Text Bubble” to the images with it. The application ships with many sticker packs.


YouCam Perfect doesn’t stop you from using its features on your existing images. You can do whatever you want to your photos, even if you did not click them using this app, which most apps don’t allow.


Photo Filters: The ability to add a filter to a photo and that too in real-time has been one of the biggest highlights of apps like YouCam Perfect and Retrica. Not only does it save time, but also makes it easier for the user to pick a filter and decide whether it will suit their image or not.


On YouCam Perfect, you can use any of the below-listed ways to apply a filter to your photo:


Using the Photo Edit option: This works for photos you click with or without using YouCam Perfect. To use it, tap the ‘Photo Edit’ option. Now, pick an image from the library to which you have to apply a filter. Hit the ‘Edit’ button, and from the list, select the ‘Effects’ tool. Choose a filter, apply the same to your photo, and save it.


While clicking a photo: This method is the same as what you may experience on Retrica, and Candy Camera. When you use the app to click a new selfie, swipe left or right to change the applied effect.


Verdict: If you are looking for a feature-rich app to click and edit your selfies, you can use YouCam.


The app has a clean and beautiful UI. It is easy to use. Whether it is the main screen, filters panel, or tools, every option is right in front of you.


Apart from features what you may find in other related apps, the YouCam Perfect offers a few extra ones. These include mosaic, HDR, image overlays, teeth whitener, etc. There’s also an option to add more features by paying money.


Pop-up ads are there to frustrate you almost everywhere in the app, but you can pay to remove them. If you are a free user, you will have to deal with ads as YouCam Perfect requires an active data connection to download sticker packs, frames, etc.


Update frequency of this app is excellent. You can expect surprises and bug fixes with every release.


Availability and support:


Android – Requires Android 4.0 or later.


Size – Varies with device.


Price – Free


Ad-free – No. Charges to remove pop-up ads.


In-App Purchases – Yes. $0.99 to $99.99 per item


Content Rating – Everyone (3+)


Offered by – Perfect Corp.


Download YouCam


Also Read:


Top 10 Best Free Android Photo Editors in 2018


Top 10 Best Free Video Editors for Android in 2019


10 Best Free Audio Players for Android in 2018


Top 10 Ad Blocker Apps for Android


Top 10 Best Screen Recording Apps for Android


That wraps up. I hope you like these apps and share your experiences with others as well. If we missed out any of your favorites, do share it in comments.

How to Find iOS 12 Measure App Missing on iPhone X/8 Plus/7 Plus/ 6S Plus/SE


Find iOS 12 Measure App Missing on iPhone X/8 Plus/7 Plus/ 6S Plus/SE


Guys, Welcome on our daily Gihosoft iPhone tips, I hope you successfully installed iOS 12 update on your iPhone, iPad using OTA update or via iTunes whatever. Performance improved and stable iOS 12 come up with some brand new Features along with Changes in old Applications and bring a brand new ARkit App called Measure App. The completely new iOS app is an alternative of third-party app Tap Measure.Must Read:icloud lock tool

Here I’m going to several tricks to get back Measure App missing on your Apple Phone or tablet. Lets read carefully without miss nay line!
Find iOS 12 Measure App Missing on iPhone and iPad


Use Spotlight Search to Find disappeared Measure App

Because you’re not only one but I’ve experienced the same problem when I installed first iOS 12 Beta on my iPhone X at that moment I found my measure App using Spotlight Search and it was placed in a folder on the fourth Page App. By default, it’s probably knowingly misplaced and its somewhere super random.
Find Removed Measure App on App Store to Download & Install again

The second reason, Measure App Missing is that App could accidently deleted. In this case, you can download and Install Measure App on the Apps Store.

To Download and re-install Measure App on your iOS 12 Devices following Steps will help you-

Launch the Apps Store (you must have signed-in with Apple ID) > Enter Measure App into Search bar it finds and gets it back.

Whenever you find Measure Application on App Store, you will get a cloud with the bottom arrow icon next to the Measure App name. Just Tap on that cloud icon to Download again. After that, you will able to use Measure App on your iPhone, iPad.


Suppose you can navigate Measure App on App Store on your iOS device then ask your friend or family member to share Measure App through AirDrop. Please Keep in mind, those guys must have iOS 12 running iPhone, iPad, iPod Touch. You can see below
Apple Measure App Compatible Devices.

The iPhone 6S, iPhone 6S Plus, iPhone SE, iPhone 7, iPhone 7 Plus, iPhone 8, iPhone 8 Plus, iPhone X.

12.9-inch iPad Pro, 12.9-inch iPad Pro Wi-Fi+ Cellular, 10.5-inch iPad Pro, 10.5-inch iPad Pro Wi-Fi+ Cellular, 9.7-inch iPad Pro, 9.7-inch iPad Pro Wi-Fi+ Cellular, iPad Wi-Fi (5th Generation), iPad Wi-Fi+ Cellular (5th Generation), 12.9-inch iPad Pro (2ndgeneration), 12.9-inch iPad Pro Wi-Fi+ Cellular (2nd generation), iPad (6th Generation), and iPad Wi-Fi+ Cellular (6th Generation).

A bad news for iPhone 5S users because of the iPhone 5S owner unable to get Measure app in iOS 12. To use measure app download third-party App or upgrade your old iPhone to latest model iPhone.
Restore Your iPhone/iPad without Data lost


Connect your iPhone and iPad to iTunes via lightning cable.


Unlock your iPhone to Sync & Detect iPhone on iTunes. iTunes will Take Backup on Mac automatically. Now Quit iTunes.


Now Force Restart your iPhone X

Press and Quickly Release Volume up button, Press and Quickly Release Volume Down button. Now only Press and Hold Side button or Power Button until you see the apple logo on the screen.

Also Keep your eyes on iPhone Screen, Your iPhone screen is Black and Showing Lighting connector & iTunes.

The iPhone is in recovery mode or DFU mode. Now open iTunes on Mac.

4. Now, You will see iTunes prompt that has two options, One is Update and Another is to restore. Go with Update to install the new copy of iOS on your iPhone X without lost or Wipe data.

You can’t catch your iPhone X in recovery mode, Repeat the steps 3 until you see iPhone in recovery mode.

Sit back until you see the screen like new iPhone. Use iTunes to set up your iPhone, Because iTunes will restore all the data back to iPhone X.

Note: You are stuck and unable to get out from recovery mode, So disconnect your iPhone from Mac computer. Use Side button to reboot iPhone.

Now Enjoy the Measure app [it’s Built-in app comes with new iOS firmware].

Also useful: How to Unlock a Disabled iPhone Without iTunes.

The Utilities categorized Measure App tool supports 33 Languages Worldwide.

Enjoy, Apple ARkit 2.0 first App in form of accurately mapping 3D object in the real-world using Measure App without physical Measure Tap.

After getting Measure App on your iDevice and suppose you will face Measure App like Measure App Stuck, not responding, unresponsive iPhone then don’t worry, send your Measure App problem in the comments! We’ll give you reply soon!

If you accidentally lost any data on iPhone, like iMessages deleted from iPhone/iPad, you can try Gihosoft iPhone Data Recovery to easily get back your lost iOS data. Moreover, you can use it to extract iTunes and iCloud backup freely.


Free iTunes/iPhone Backup Extractor for iPhone, iPad

Jihosoft iPhone Backup Extractor is a powerful tool to recover and extract important data from iPhone, iPad & iPod touch backup on Windows or Mac.


Thanks for Reading.

2018/08/26

How to Fix Why Won’t My iPad Sync to iTunes?


How to Fix Why Won’t My iPad Sync to iTunes?
Tip #1 - Update iTunes


The first thing you should try is updating your iTunes to determine where the problem is stemming from. If iTunes has a problem or a bug which has been fixed in a recent update then by updating iTunes, the chances are that the issue will be fixed and you'll be able to sync your iPad afterwards.


When you first open iTunes, if an update is available then a notification should prompt you to update.


If you don't see this notification, then click on the "Help" tab followed by "Check for Updates". If an update is available, simply download and install it, and your iTunes will be reinstalled with the newer version.


If updating iTunes doesn't work, the problem lies elsewhere (possibly your settings).
Tip #2 - Check Your Sync Settings


The issue might simply be that you haven't chosen to sync the types of data that you want iTunes to sync with your iPad. When you connect your iPad and iTunes is launched, click on the device icon at the top of the program and the summary page will be shown.


Using the left panel, click on one of the data types that you want to have synced (e.g. Music, Movies, Podcats, etc). If the box next to, for example, "Sync Music" hasn't been checked then go ahead and check it now.


From then on, whenever you sync your iPad with iTunes, that data type will be synced.
Tip #3 - Reinstall iTunes


Following on from the first tip that we gave you if an update isn't available then it's a good idea to uninstall and reinstall iTunes on your computer. Doing this will not only install clean versions of the iTunes program files but it will also reset all of your preferences (which is preferred as if there is a problem with the settings file, the problem will be fixed).


To uninstall iTunes on a Windows computer, go to the Control Panel and click on "Uninstall a program". Locate iTunes, click on it, and click the "Uninstall" button at the top of the menu - after a few minutes iTunes will have successfully uninstalled, and you can re-download it from the iTunes download website.
Tip #4 - Use iCloud Instead


Obviously, this won't fix the problem, but by choosing to sync your iPad with iCloud then you don't have to worry about your iPad not syncing to iTunes and you can have better management over your iPad's data.You may also like:


Gihosoft Total Video Converter is a professional all-in-one video tool that enables you to convert videos and audios into various different formats.


You may also like:online youtube downloader


To take an iCloud backup from your iPad, open the "Settings" app and go to "Apple ID > iCloud > iCloud Backup", and tap on "Back Up Now".


After a few minutes, your iPad's data will be backed up but if you have the "iCloud Backup" slider enabled on this menu then your data will automatically be synced with your iCloud account regularly.


Jihosoft Giveaway Alert:


iPhone Backup Extractor - Extract Data from iPhone Backup


The best iPhone Backup Extractor Free software to extract photos, text messages, contacts, voice memos, note, WhatsApp, Viber and etc from iPhone/iPad backup.


You may also like:Gihosoft iPhone Data Recovery


Must Read:Jihosoft iTunes Backup Unlocker How to Fix Why Won’t My iPad Sync to iTunes?

2018/08/20

How to send 'secret emails' via Gmail on Android and iPhones 2019

How to send 'secret emails' via Gmail on Android and iPhones 2019


Just a few days ago Google introduced the conversational thread disabling/enabling feature in its Gmail for Android and iOS. This time, the search giant has brought another desktop feature to the smartphones – Confidential mode. For those unaware, this feature was launched on desktop versions earlier this year.

You may also like: How to Deactivate or Delete Kik Account Permanently Top Guide 2018

Gmail’s ‘Confidential mode’ prevents a mail from being forwarded, copied and downloaded on the desktop or a smartphone. This feature is set by the sender of the mail. What’s more is that the email can 'self-destruct' after a set amount of time. In case the email content is extremely sensitive, one can even lock access for the particular user with an SMS code.

Google, however, has clearly mentioned that although the ‘Confidential Mode’ brings all the security features onboard, it doesn’t prevent one from taking a screenshot of the content and sharing it with others. Also, this feature is not yet there for G Suite users.

Here’s how to use the feature on desktop, Android and iOS

On Android smartphones:

Step 1: Open Gmail and ‘Compose’ a message.

Step 2: On top right tap on the three-dot ‘More’ option and select ‘Confidential Mode’. Those who already have this setting activated can tap on the option to edit it.

Step 3: Set up the mode with expiry date and passcode.

Step 4: Tap on ‘Done’ and send the email.

To remove access early:

Step 1: In Gmail, click on the ‘Sent’ section placed on the left side.

Step 2: Open the Confidential email.

Step 3: Click on ‘Remove access’ option. This prevents the recipient to view the message before the expiration date


On iPhones/iPads:

Step 1: Open Gmail and ‘Compose’ a message.

Step 2: On top right tap on the three-dot ‘More’ option on the right and select ‘Confidential Mode’. Those who already have this setting activated can tap on the option to edit it.

Step 3: Set up the mode with expiry date and passcode.

Step 4: Tap on ‘Done’ and send the email.

You may also need: How to Recover Deleted WhatsApp Messages and Photos from iPhone

Step to remove access early is same as for the Android smartphones.

Desktop:

Step 1: Open Gmail and ‘Compose’ a message.

Step 2: At the bottom right corner of the message click on the ‘Confidential mode’ lock icon. Those who already have this setting activated, they can click on the icon to edit it.

Step 3: Set the expiration date and passcode. This will protect both the text and attachments.

Step 4: Click save and send the message.


Note: If you select ‘No SMS passcode’, the receiver will be able to open the mail directly. Non-Gmail users, however, will get emailed a passcode. On choosing ‘SMS passcode’, the recipient will get a passcode via a text message. For this, the sender is required to enter the phone number of the recipient.

If you accidentally deleted important messages from iPhone, give a shot at Gihosoft iPhone Data Recovery, which is a professional recovery software for iOS devices to recover various lost data like contacts, photos, notes, videos and so on.


Free iTunes/iPhone Backup Extractor for iPhone, iPad
Jihosoft iPhone Backup Extractor is a powerful tool to recover and extract important data from iPhone, iPad & iPod touch backup on Windows or Mac.
You may also like:
Gihosoft Total Video Converter is a professional all-in-one video tool that enables you to convert videos and audios into various different formats. You can also download videos from YouTube or other online video sharing sites and convert them easily. Plus, you’re able to personalize your videos with its inbuilt editor, such as, trimming, cropping, applying video effects, adding watermark, subtitles, and more. If you need a powerful and professional desktop video converter program, just download Total Video Converter and follow the step-by-step guide here to have a try.

If you have any suggestion or question, feel free to leave a message below.

2018/08/19

How to Fix HomePod Error -6722 [Setup Failed]


Here’s Fix HomePod Error -6722 [Setup Failed]

Finally, the much-awaited device HomePod arrives in your hand. The HomePod is featured as a speaker with all new specs and smart design with quite a healthy price. Now it’s time to set up the HomePod to use the speaker perfectly. I hope that you know very well how to set up the HomePod. Moreover, there are also chances of errors while setting up the device.

We’ve have found that most of the users are facing error -6722 while setting up. So we have figured out some of the troubleshooting tips which might be helpful for you to set up HomePod successfully.
Let’s Get Fixed HomePod Error -6722 and Setup Again


Fix #1. Update your iOS to the latest version

You can check whether your iPhone/iPad is up to date or not in settings.

Step 1: Go to “Settings”.

Step 2: Tap on “General” and then “Software Update”.

If your device is not updated the update it as soon as possible.
Fix #2. Check Whether You Have logged in to iCloud Account

When you set up the HomePod you will need to use the same apple id that you have used on your iPhone. If you will use different Apple ID in HomePod then it will show error. Else you must log-out and again log-in with your iCloud ID.

NOTE: Also you will require two-factor authentication set up for iCloud ID.
Fix #3. Make Sure That Bluetooth is turned on And iDevice is Connected to internet

Once you will get the HomePod error -6722, just disconnect your iOS device from Wi-Fi and again connect it or you should also go for resetting network settings. There is one more factor that can create issues in connectivity, that is Bluetooth. Similarly, disconnect and again connect the Bluetooth.
Fix #4. Reset The HomePod

There are two methods are available to reset the HomePod. One is you can reset it using the Home app from iPhone and other is manually you can reset HomePod.
Using iOS Device Home App

Step 1: Launch “Home” app.

Step 2: There is the “Room” tab, long press “HomePod”.

Step 3: Tap on “Details”.

Step 4: And finally click on “Remove Accessory”.
Reset HomePod Manually without iPhone, iPad, or iPod Touch

Step 1: At first, unplug the HomePod and then Plug it again.

Step 2: Long press on the Top of the HomePod.

Step 3: Thereafter, the white light will turn in to red and Siri will speak that your HomePod is going to reset.

Step 4: Don’t lift your finger until you hear three beeps
Fix #5. Reboot iDevice and Router

Till now you have rebooted the iPhone so many times so there is no need to explain how to reboot the device. And for rebooting router, you should check respective brand’s website to complete the task successfully.


How to Free Up Storage on Your iPhone (Any Generation)

Also, you can disable the router’s firewall temporarily. Also, Reset Homekit is quick tips to fix and reset all home app configurations. Once you setup HomePod, Turn the firewall on and find everything is okay.
Fix #6. Uninstall and Re-install the Home app

This action will remove all your data related to the Home app and HomePod. And when you re-install the Home app again the app will start as new and all the small system or applications bugs will fix automatically.

Also, the Apple Music app should be installed.

You may also need:

How to Unlock a Disabled iPhone Without iTunes

4 Tips to Fix Unable to Install iOS 12 Update

How to Recover Data from iPhone/iPad after iOS 11/12 Update

If one day your iPhone get stuck in recovery mode, you’d better rescue precious iPhone photos and videos first, then try to fix your iPhone. Gihosoft iPhone Data Recovery is a powerful data recovery software for iOS devices if you lost any data or delete it accidentally.


Free iTunes/iPhone Backup Extractor for iPhone, iPad

Jihosoft iTunes Backup Extractor is a powerful tool to recover and extract important data from iPhone, iPad & iPod touch backup on Windows or Mac.

You may also like:

Gihosoft Total Video Converter is a professional all-in-one video tool that enables you to convert videos and audios into various different formats. You can also download videos from YouTube or other online video sharing sites and convert them easily. Plus, you’re able to personalize your videos with its inbuilt editor, such as, trimming, cropping, applying video effects, adding watermark, subtitles, and more. If you need a powerful and professional desktop video converter program, just download Total Video Converter and follow the step-by-step guide here to have a try.

2018/08/15

Top 10 Best Android Wear OS Apps 2019


Top 10 Best Android Wear OS Apps 2019


Wear OS is a toned down version of the Android operating system. It powers 1+ million smartwatches. Although Wear OS belongs to the family of Android OS and supports APK format files, you should install the apps designed for it. If you don’t do so, the OS or the application might crash.

Once you buy a smartwatch, the first thing you should do is install apps that will keep you connected with the online world and improve your productivity.


Here’s the list of top Wear OS applications you can install on your Android smartwatch:


1. CityMapper


CityMapper is an award-winning application that allows users to find restaurants, bus, metro and railway stations near them. The app gives users access to a detailed map of over 100 cities.

Like other top navigation apps, CityMapper can display the shortest route between two places. Hence, if you don’t want to travel in a vehicle or transport facility, you can follow the route suggested by the CM application. The app can save the map to the storage memory of the smartwatch.

Apart from maps, CM displays the arrival and departure time of local transit facilities. CityMapper is fast and lightweight.For now, check:Free iTunes/iPhone Backup Extractor for iPhone, iPad

Jihosoft iTunes Backup Extractor is a powerful tool to recover and extract important data from iPhone, iPad & iPod touch backup on Windows or Mac.

2. Facer Watch Faces


Facer is a tiny app that gives you access to 10000+ watch faces. It enables you to download watch faces and customize its colors, fonts, etc. It lets users change the layout of date, time, etc. The app displays eye soothing animations when you install and apply one of its themes.

The app provides a DIY tool with which you can design your own watch faces. Once you create a WF, you can share it with other users of this application. Facer supports smartwatches that have a round, rectangular or square display.

Must see: The Best Ringtone Apps for Android

3. DrexTee


The Wear OS can display the Android or IOS notifications on the smartwatch. If the notification is a message, you must either use your phone to reply or use Drextee.

The app lets users reply to messages received on popular messaging apps with its intuitive keyboard interface. It supports voice commands and emojis. Drextee lets you find contacts and messages. It can correct typos and suggest words when you’re a typing a message. It ships with 5 different color themes.

4. Strava


Strava is a fitness tracker application with many features. It tracks your steps, speed, etc. It also monitors your heartbeat and marks the route you take on a map. Strava runs in the background and monitors your activities in real-time.

The application has “Training Challenges” feature that allows users to test their limits. It syncs the user’s fitness data to the Strava servers. To see your health report, you can either log in to the Strava website or Android/IOS app.


5. IFTT


IFTT is one of the most powerful Android tools right now. It is a small utility that allows you to automate things with “Applets”. The app supports 500+ service and popular smart devices such as Amazon Alexa, Google Home, etc.

You can configure IFTT to display weather, missed call, SMS, email notifications on the Wear OS powered device. IFTT enables users to explore the Applets built by other users. Hence, if you are unable to create an Applet, you can refer to the Applets created by other users of IFTT to get inspiration or learn IFTT.

Also see: Top 5 Best Antivirus Apps for Android for Virus Removal


6. Photo Wear


PW is an app with which you can set your favorite gallery or Instagram photos as the background image of your wearable device’s display.

PW lets you crop pictures. It also allows you to apply filters to the images. It changes the photos at random intervals. The free version of PW supports 9 images. It doesn’t sync pictures from Instagram automatically.


7. Uber


Uber is the most popular taxi booking app. It allows you to book taxis with your smartwatch even if you’re not carrying the phone. The application uses the GPS service of the wearable device to locate the, calculate fares, etc.

Although the display of wearable devices is tiny, Uber’s smart interface makes it easy to specify the destination/place where you want to travel. The app allows you to see the details of the driver. It displays the driver’s ETA and your current location when you’re in the taxi.

8. Google Pay


Want to save time on offline shopping? Use the Google Pay application. GP remembers your credit and debit cards so that you check out quickly in your favorite store. Google Play supports NFC technology. It doesn’t WiFi or Bluetooth technology on a smartwatch.

9. Google Keep


Google Keep is a free app through which users can create notes and to-do lists. It is easy to use, lightweight and powerful. Users can tag notes and set reminders in GK. They can insert audio recordings, images in the notes.

Google Keep can extract text from images. It enables you to share the note/list with other users. Once the task is over, you can archive the to-do list or note with Google Keep.

Users can pin notes. They can also search notes by name in GK. You can use this Google application to remind you to take pills, go out for a walk, bring kids from the school, wake you up in the morning, etc.

10. Google Play Music


GPM is one of the top music streaming services in the world. It allows you to control music played on the phone with the smartwatch.

The app enables users to select library or radio stations. It displays the track name on the display of the wearable device. It makes users aware of the next track in the queue. Users of the Play Music application can save the currently played track to their Android device. Hence, they can listen to their favorite songs offline. GPM provides an option to shuffle songs in the playlist.

Conclusion:

Uber, Google Keep, Play Music, Pay, Facer, Strava, Photo Wear, IFTT, and Drextee are the 10 best Wear OS apps.
Jihosoft Android Data Recovery is the most powerful and professional data recovery software for Android that can restore deleted or lost contacts, photos, videos, audios, SMS, call logs, WhatsApp chat, Viber messages from any Android devices due to accidental deletion, virus attack, formatting. It supports all popular Android smartphones and tablets like Samsung, HTC, LG, Huawei, Motorola, Nexus, etc. In the meantime, you will be guided step by step if you never used this kind of tool before.


Best Samsung Data Recovery Software:
Easily Recover Deleted/Lost Photos, Messages, Contacts, Call Logs, WhatsApp,
Musics, Videos etc. from All Samsung Devices


Must Check Out Posts:


How to Enable USB Debugging on your Android Device

Restore WhatsApp Backup from Google Drive to iPhone/Android

How to Use USB OTG on Broken Screen Android?

How to Recover Data after Factory Reset on Android

Backup & Restore Viber Messages On Android

Android USB Driver Not Working on Computer

2018/08/14

How to share Apple iCloud storage with Family Share 2019

How to share Apple iCloud storage with Family Share 2019

How to set up iCloud Storage sharing on an iPhone or other iOS devices


Go to Settings and at the very top, tap on your name


Select Set Up Family Sharing, followed by Get Started


Select iCloud Storage


If you don't already have one, update to a 200GB or 2TB plan


Once completed, you'll be prompted to invite five family members/loved ones to share your iCloud storage plan


How to set up iCloud Storage sharing on a Mac


Open system preferences, select iCloud


Then click Manage at the bottom right


If necessary, buy more storage (200GB or 2TB)


From iCloud preferences, select Set Up Family Follow the onscreen prompts


Once completed head to My Apps & Services, select iCloud Storage
Image result for share Apple iCloud storage with Family


Select Start Sharing

Family members who already have an iCloud subscription have to option to continue or join the family plan, they can't keep both active at the same time. If you get stuck setting up Family Sharing, Apple has detailed instructions here.

Jihosoft Giveaway Alert:
iPhone Backup Extractor - Extract Data from iPhone Backup
The best iPhone Backup Extractor software to extract photos, text messages, contacts, voice memos, note, WhatsApp, Viber and etc from iPhone/iPad backup.
Must Read:Jihosoft iTunes Backup Unlocker

2018/08/13

How to Import Photos from iPhone to Mac with iCloud


How to Import Photos from iPhone to Mac with iCloud

You can use iCloud to sync your iPhone photos wireless to your PC. However, for this to work, the photos you have on your iPhone have to be backed up to iCloud. To use iCloud to transfer your photos from your iPhone to your PC, you need to follow the steps outlined below:


Launch Photos and then click Photos > Preferences> iCloud to sign in using your Apple ID and password.


After photos on iCloud has been updated, simply drag the photos to your a folder on your Mac.


Note: For you to be able to sync the photos you have on your iPhone to your computer using iCloud, you need an internet connection. Also you will need to pay extra money each month when your iCloud storage is full and over 5GB.If you can’t sync with iTunes and want to rescue data from a disable iPhone, you could try Gihosoft iPhone Data Recovery. Also feel free to ask questions on the iDevice is disabled error in the comments section below.

You may also like:

How to Rescue iPhone Photos and Videos When Stuck in Recovery Mode

How to Get iMessage on Windows PC

4 Easy Ways to Transfer Photos from iPhone to Computer


Download iOS 12 Beta 7 without developer account


WHAT’S NEW IN IOS 12 BETA 7?

iOS 12 Beta 7 weighs around 300-500 MB and has a build number of 16A5354b. Just like its predecessors, it’s an “improvement” update and fixes the following bugs present in beta 6 –


Settings quitting unexpectedly after viewing or selecting a voice in Speech settings.


Settings quitting unexpectedly when accessing “Siri & Search” preferences.


Apple TV 3rd-generation not functioning properly as a HomeKit hub.


CarPlay shortcuts that need confirmation may not work properly.

Surprisingly, the all-new Group FaceTime feature has been axed completely from this build. According to the release notes, Apple will include it in a future firmware update.


As far as new features go, the “USB Settings” section receives some new options. You will now need to unlock your passcode-protected device before connecting it to a computer or a USB accessory.

Furthermore, if you use a USB device to key in your passcode, you can set it up by enabling “USB Accessories” from the Settings app.

If you are enrolled in Apple’s developer program, you can get this update from your developer dashboard. If you don’t have a paid developer certificate, you can use the download links given below.


Important – Download links will go live within a few minutes.
IOS 12 BETA 7 DOWNLOAD
OTA PROFILE


Download
IPHONE


iPhone SE, iPhone 5s


iPhone 6s, iPhone 6


iPhone 6s Plus, iPhone 6 Plus


iPhone 8, iPhone 7


iPhone 8 Plus, iPhone 7 Plus


iPhone X
IPAD


iPad Air, iPad mini 2


iPad mini 4, iPad Air 2, iPad mini 3


iPad (5th generation), iPad (6th generation)


iPad Pro (9.7‑inch)


iPad Pro (12.9‑inch)


iPad Pro (10.5-inch), iPad Pro (12.9-inch) (2nd generation)
IPOD


iPod touch (6th generation)
SHOULD YOU UPDATE?

According to early adopters, this update is super-buggy and slows down all compatible devices, especially the iPhone X.

All in all, there’s nothing new in iOS 12 Beta 7 build except for a few USB settings. You should probably wait for the next beta update if you want to upgrade your device.If you can’t sync with iTunes and want to rescue data from a disable iPhone, you could try Gihosoft iPhone Data Recovery. Also feel free to ask questions on the iDevice is disabled error in the comments section below.

You may also like:


How to Rescue iPhone Photos and Videos When Stuck in Recovery Mode


How to Get iMessage on Windows PC


4 Easy Ways to Transfer Photos from iPhone to Computer


2018/08/12

What to Do If You Forgot Encrypt iPhone Backup Password 2019


What to Do If You Forgot Encrypt iPhone Backup Password 2019

Solution 1. Try Any Password You Can Remember

If you can resist a shred of doubt in your mind and allow a quiet confidence within you, it’s possible to have a distinct privilege of getting back your forgotten encrypt iPhone backup password. Sure, it seems to be counter-intuitive, but it has worked for several iPhone users. Judging from the meditative pause of several users, it’s believed that passwords are keywords commonly used by several individuals; a combination of strings means several things to people.

So relax your mind and try the likely character combination you can remember. Don’t be surprised that the right key comes unconsciously.
Solution 2. Use iCloud Backup

Here comes the second method on how to find encrypted iPhone backup password. This method works for those who have gone a bit overboard with the unlocking scenario. You can do funky stuff during this moment only if you’ve done iCloud backup that has the data you desire to restore. Through this , it’s possible to restore your iPhone from iCloud backup to replace iTunes backup.

To retrieve your data through this technique, your phone must have backup the data before the incidence. You can be sure of restoring your iPhone from iCloud backup if that framework has been implemented earlier before the scenario.
Solution 3. Erase All Settings and Create a New iTunes Backup

The more the techniques you experiment, the more likely to be successful at iPhone backup password recovery if you forgot the encrypted iPhone backup password. Unlocking can be easy if you erase all the settings on the phone and simultaneously create a new iTunes backup. The process is easy yet a bit daunting task.To reset the settings, follow the procedures below:

Step 1. Launch your iOS device, Tap the setting menu, then go to General and Click on ‘Reset’ option

Step 2. Enter the required iOS password.


Step 3. Follow the screen instructions to reset your setting. Be aware that this action doesn’t have any negative effect on your user-data or passwords. That doesn’t stop the fact that settings like wallpaper, home screen layout etc. won’t reset. Furthermore, the action will remove your encrypted backup password.

Step 4. Connect your device to iTunes again and create a new encrypted backup.

You may also like:

If you lost videos from iOS Camerall Roll which are nowhere to download again, you can use Jihosoft iPhone Data Recovery to get back deleted videos from iOS device including iPhone, iPad and iPod Touch.Please check jihosoft iphone data recovery

whatsapp android to iphone

2018/08/11

iTunes Error 9006 and the Best Way to Fix


1 The Reasons Why iTunes Error 9006 Occurs
There could be a number of reasons why error 9006 occurs:

Usually this error occurs when the Apple server is busy or for some reasons iTunes cannot communicate to that server.

It may also be a problem with your network connection.

IPSW file is required in order to complete the software update process, if this file fails to download, then iTunes displays error code 9006.

2. Update iTunes

iTunes Error 9006 can also occur if you are using an older iTunes version. It is possible that the version of iTunes you are using might not be supported to restore or update your iDevice. So it would be a good idea to update your iTunes and then try to restore or update your iDevice.

Follow these instructions:

Step 1: Open iTunes

Step 2: Navigate to Help > Check for update option.

Step 3: Once you are notified that the update is available, simply agree to update and then follow the on-screen instruction and the latest version of iTunes will be installed on your computer.


3. Reboot the iDevice

If the error still occurs after updating to the latest version of iTunes, then the problem could be related to your iDevice. You can solve the issue by simply restarting it.

Follow these instructions:

Step 1: Press the Power (sleep/wake) button of your iDevice.

Step 2: Once the Power slider is displayed on the screen, use it to turn off your iDevice.

Step 3: Then simply use the Power button again to reboot the device.

If for some reason you can’t turn off your iDevice, then you will need to forcefully restart it.

Follow these instructions:

Step 1: Press and hold the Power and Home key for a few seconds until the screen goes black.

Step 2: Once the Apple logo appears on the screen, let go of the buttons. Your iDevice will restart.


4. Manually Download the IPSW File

As mentioned above, iTunes error 9006 can occur if iTunes is unable to download the IPSW file. So you can fix the issue by manually downloading that file and then using it to update/restore your iDevice.

Follow these instructions:

Step 1: First, download the IPSW file from https://ipsw.me, make sure to download the file which is compatible with your iDevice.

Step 2: After the file is downloaded, open iTunes and navigate to its Summary section.

Step 3: Once there, press and hold the Shift key and then click the Update or Restore option according to your choice.

Step 4: This will open file browser asking you to choose the IPSW file. Navigate to the folder where you have downloaded that file and then select it. Your iDevice will start updating or restoring without error 9006.


If you lost videos from iOS Camerall Roll which are nowhere to download again, you can use Gihosoft iPhone Data Recovery to get back deleted videos from iOS device including iPhone, iPad and iPod Touch.


The Best Power Supplies for 2023

  The Best Power Supplies for 2023  Here are some recommendations for the best power supplies in 2023: • Corsair RM/RMx Series - High-end 80...