Creating an iPhone or iPad backup should be routine for most users, as it's a simple procedure and the easiest way to recover your data if your device is replaced, lost or stolen.

There are two types of backup available to iOS users. iCloud backups are encrypted automatically and stored in the cloud, and you can create and use them anywhere with a Wi-Fi connection. iTunes backups on the other hand are created and stored on your Mac or PC, encryption is optional, and you have to connect your device to your computer to restore one.Leer más:G2a sitio
How to Create an iCloud Backup
Connect your iOS device to a Wi-Fi network.
Launch the Settings app.
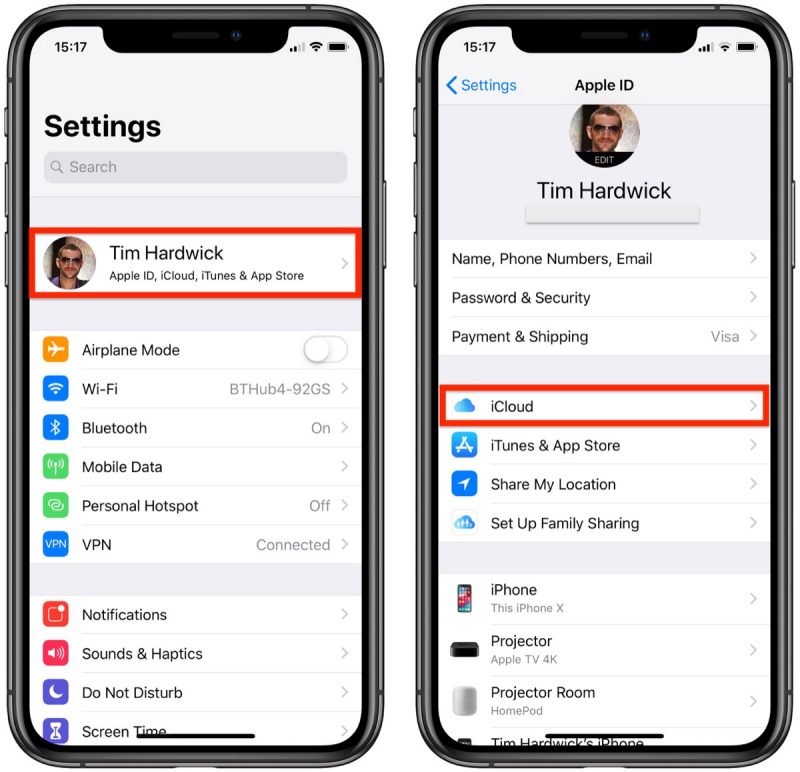
Tap your name in the top banner.
Tap iCloud.
Tap iCloud Backup.
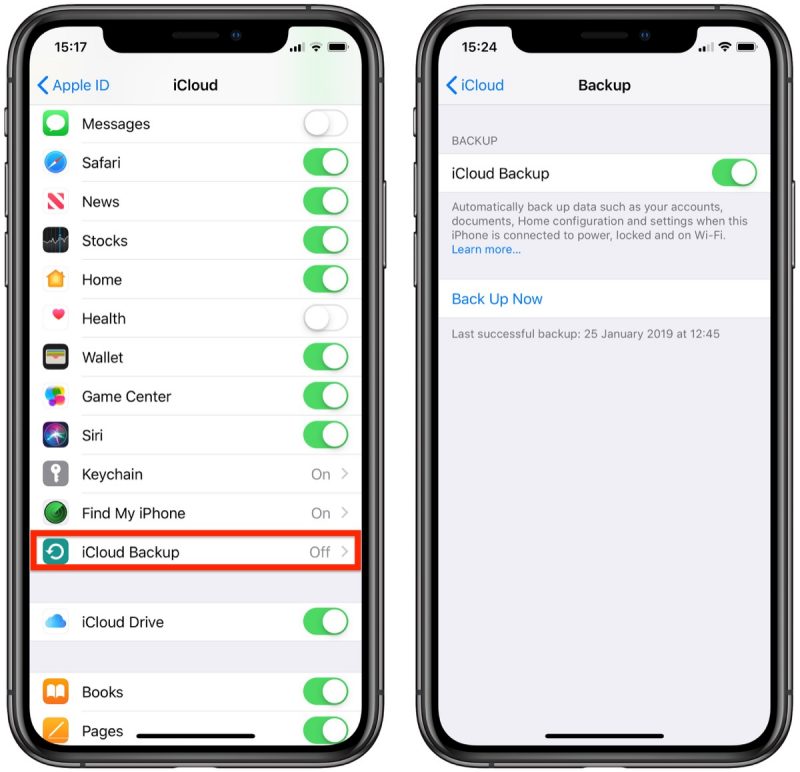
Toggle the iCloud Backup switch to the green ON position.
Tap Back Up Now and wait for the process to complete.
Once you've switched on the toggle next to iCloud Backup, your device will automatically back up each day, so long as the device's screen is unlocked and it's connected to a power source and a Wi-Fi network. Also make sure that you have enough available space in iCloud for the backup. iCloud comes with 5GB of storage for free, but most users will quickly eat that up. Fortunately, plans start at just $0.99 for 50GB of storage.Weiterlesen auoklicker
How to Create an iTunes Backup
The following step-by-step instructions on how to create an iTunes backup are given for iPhone, but apply to iPad and iPod touch too. The second set of steps shows you how to archive the backup if needed.
Connect your iOS device to a Mac or PC using a Lightning to USB cable.
Open iTunes.
Click the device's icon in the top-left menu.

Under Backups, click This computer.
Tick the Encrypt iPhone backup checkbox if you want to back up your login credentials and any Health and HomeKit data.
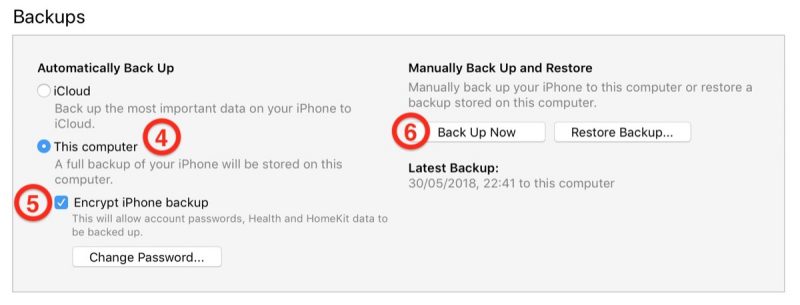
Click Back Up Now and wait for the backup process to finish. It will take around five minutes to complete depending on what's installed on your iPhone.
Archive the Backup
An archived iTunes backup saves the current state of your iOS device and prevents it from being accidentally overwritten by subsequent backups. Creating an archived backup is useful if for example you want to install a public beta of iOS, since if something goes wrong with the beta, you can use it restore your device to its previous operating system version. The following steps show you how to archive the iTunes backup that's created using previous steps.
Click iTunes -> Preferences… in the macOS menu bar.
Click the Devices tab.

Right-click (or Ctrl-click) the new backup, and select Archive from the contextual dropdown menu.
Backing up should be done on a a regular basis. If you're using iCloud, it will be done automatically, but if you're using iTunes, make sure to initiate a backup every week or two so you don't lose important data. Sponsor ads:
Gihosoft RePicvid Free Photo Recovery Software provides a free photo recovery software for windows to help users recover the deleted or lost photo for free.
If you lost data after you updated to a new iPhone, you can always use Gihosoft iPhone Data Recovery to get the data back from the old iPhone or backup.You may also like: iphonerecovery.com


No comments:
Post a Comment